Saturday 30 March 2013

Dash Wiring

I got my dash wired up over the last couple of evenings:


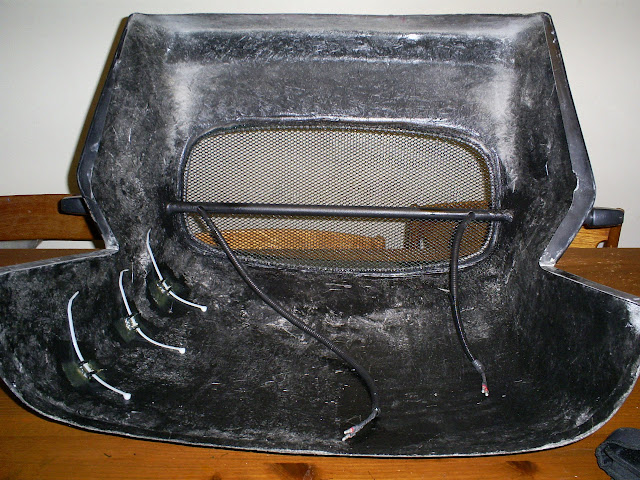
The wires are all wrapped in self amalgamating tape, and held in place with cable-tie saddles screwed to the dash with self tappers.

In the middle of the dash are the mini clocks.
Just below them is my VRS-to-digital interface for the speed signal.
To the left are the hazard and fog switches, and a relay I had to add to invert the hazard signal.
To the right are my CAN interface modules to take the various signals from the car and generate CAN messages for the mini clocks.

Plugged it into the car and most things seem to work!
Need to do a small tweak to the RPM, as currently it's displying twice the engine speed!
The brake warning isn't quite working.  Turns out the brake sensor is 500 Ohms when off - hadn't expected it to be anything like that, so will need to reduce the value of my pull-up resistor for that input.
Haven't tested the speed yet, but don't expect the scaling to be anything like correct!
The only other thing I'm not sure about is the fuel level.  It's currently displaying as 1% full with about 10l of fuel in the tank, so that might need some futher investigation.

---------

UPDATE:
I spent some more time on this over the bank holiday weekend, and all the dash functions now work :)  (except possibly vehicle speed which I haven't yet checked).

Adding a 1k pull-up to 12V to the brake warning signal fixed that problem.

Tweaked the code to fix the double RPM issue.

I've left the fuel level as is for now.  It sort of works, in that it's fairly accurate at full tank and empty tank.  The problem is that my code assumes a linear voltage from empty to full, but in reality it's curved.  I might add some code to linearise the signal at some point, but it'll do for now.

Whilst testing I spotted that my indicator tell-tales weren't keeping up with the indicators, but just sending the CAN messages to the clocks more frequently fixed that.

Also noticed my charge warning light was permanently on.  That needed a 120 Ohm pull-up with a diode in series adding.  Not sure why, but it appears that alternators need quite a strong pull-up resistor on the charging light wire to actually initiate charging.

Saturday 23 March 2013

Fuse Box Cover

More sewing.  This time to cover my fuse box and relays.
Using my usual method of vinyl, scrim foam, and bias binding.


IVA seat belt end/nut covers

Whipped these up on the sewing machine for IVA:


They're vinyl with scrim foam glued on the back and a bit of bias binding around the edges.


They're held on with a single press stud.


Engine Mounts Completed

Finally got around to finishing off my engine mounts.
All they needed was the welding finishing off, a bit of shaping with the angry grinder and a few poorly applied coats of paint.


Fog Light Wedge

Made a wegde for my foglight this week to correct it's vertical position for IVA:


Made it out of a chunk of balsa wood I had lying around from my RC plane days.
Shaped and sanded, then added a couple of coats of spray paint.  Simples :)

Sunday 10 March 2013

Interior Trim and Seats

This week I've been getting in touch with my feminine side and spending some quality time with the sewing machine.

A few weeks back I did a little experiment and made a couple of these panels to fill in the gaps between the chassis rails:


I wasn't sure at the time, but it's grown on me a bit and I thought I may as well make some more, along with a cover for the tranny tunnel.
Whilst I was at it, I made gaitors for the handbrake and gearstick.


The panels are made from vinyl / leatherette glued to 2 layers of 3mm scrim foam using a can of spray contact adhesive.  One layer of 3mm foam wasn't enough to make the diamonds puff out!
I should have used 6mm or thicker foam in the first place, but I'd already bought several meters of 3mm stuff...

When I'd finished making the vinyl/foam sandwich I marked out the diamond pattern on the back and went over the lines with the sewing machine.
Finally, I stiched cotton bias binding around the edges of the panels.

I also finished fitting my seats last night.  They're Cub Sport L7 seats from Kit Parts Direct.
I decided to treat myself to a pair after getting peed off trying to get my first set of cheapo plastic seats to fit.


Thursday 7 March 2013

ECU Cover

Knocked up a dodgy cover for the ECU this week to keep the IVA man's balls away from it :)


It's just a sheet of ali with some trim down the edges, bolted to a bit of ali angle on the floor, and a chassis rail at the top.

I also added three press studs to it at the top.  My intention is to make a fabric/foam cover for the relays and fuse box which will attach to this (and also cover it's sharp top/leading edge).

VIN Plate

Fitted my VIN plate the other night.

I got it from a trophy engraver off ebay, and paid a whopping £2.05 for it, including delivery!


Mirrors

That's my mirrors fitted!


The side mirrors are from Furore, and the centre one is from CBS.

For the centre one, I just bolted through the scuttle.


For the side mirrors I sikaflexed a couple of ali stips to the underside of the scuttle to stop them wobbling about too much.


Front Indicators

Recently spent a couple of weeks fitting and wiring my headlights and front indicators.
That took a bit longer than I expected...


For the indicator extensions I went locost and used a metal tube from my old bed frame (I kept hold of a couple after dismantling it, thinking they'd come in handy for something!).

Rather than two individual extensions I went for a single tube running the whole width, with a couple of nuts welded into the end to screw the indicators into.
To hold it in place I just used sikaflex on the inside of the nose cone (and sikaflexed my front grill in place while I was at it).

Also fibreglassed some cable tie bases in to the nose cone to keep the wiring tidy.


I've changed the wiring slightly since I took the above photo so the wires for both indicators come out of the same hole in the tube, and both run down the side with the tie bases so I only have to disconnect the wires in one place to remove the nosecone.