Sunday 11 November 2012

Rear Tub Cover

Thought I'd try my hand at sewing, and bought myself a cheap sewing machine off gumtree:


After a little bit of practice I thought I'd have a go at making a cover for the rear:


This is just a prototype really, as I don't think the final one will be red!  I just happened to have a load of red vinyl left over from a previous project and thought I'd use it to practice with!

Rear Tub

Made my rear tub recently:


It's just a sheet of ali folded around the rear end and held on with rivets and sikaflex.


Thursday 13 September 2012

Tank Straps

Couple of strips of steel, splash of paint, and some edge trim.  Job done!


Sunday 2 September 2012

First Drive! (sort of)

Last weekend I managed to get the roadster moving under her own steam!
I went all the way down the drive, then all the way back again :)
Didn't dare going futher than that as my brakes don't work yet!


Here's some pics of her blinking in the day light:


Propshaft

Propshaft was shortened by Bailey Morris down the road in St Neots.
Did a great job, and even painted it, which I hadn't expected!


Exhaust System

End can was hand made by Simmi Performance, and a damn fine job they did of it too!
Exhaust tube was a couple of 90 degree bends from the bins at work.
Welded one to the MX5 down pipe flange, and the other to that.
The can just slips over and clamps on.
The can came with a hanger strap, which I've mounted to a length of 3mm steel using a pair of 'half-moon' exhaust rubbers.  The steel just bolts to the floor of the chassis.


Intake System

Couldn't easily get the massive plastic intake piping and airbox off the MX5 to fit, so I junked it all!
The airbox is a second hand carbon dynamics one supplied by my good friend Pete at work.

The tubing is all ASH silicon hose.

Still need to add a cold air feed into the airbox at some point.


Cooling System

Header tank is off an Polo.
Hoses are mostly ASH silicone one.  32mm for the big ones and 15mm for the heater ones.
I suspect I would have been better off using 30mm, as I've been having a nightmare getting the 32mm hoses to seal on the engine and radiator...


I've changed it around a little since these pics were taken, but this is more or less how I've routed it all.

EDIT:
I originally planned to block off the small outlet on the top of the polo radiator.
I also assumed the small outlet on the top of the expansion bottle was an over-pressure overflow.
It turns out it's not, so I decided to connect small outlet on the top of the radiator to it (which I think is how it's done in the Polo).
I used some left over copper pipe and hose from my fuel set-up and routed it down the left hand side of the engine bay:


Throttle Cable

The original MX5 throttle cable was a bit too short really, so I replaced it with a Sytec Universal one.

To prevent it clashing with the bonnet, I moved the bracket futher down the manifold by drilling/tapping a new hole.

To link it to the pedal I used a 'classis' trials bike brake clevis (sold on ebay for use on BSA/Norton/Triumph/etc.)


Fuel Pump and Filters


Here's some pics of how I've mounted my fuel pump and filters.
The pump is a cheapo ebay one.
The pre-filter is a mesh type to catch any swarf from my tank, and the main filter is a TKF516 (used on loads of cars from a 0.9l Cinquecento to a 4.2l A6).


Sunday 5 August 2012

First Engine Start!

I'm officially pants at keeping this blog up to date.

Done a fair bit on the car since my last post, basically finished putting the engine back together, completed the fuel, coolant, and intake routing, and done a large part of the wiring.
Last night I got to the point where I felt I could have a go at starting her for the first time, and start she did :)


Only ran her briefly as there's no gearbox oil, coolant, or exhaust yet!

Monday 25 June 2012

Engine Installed

Haven't had a huge amount of time to spend on the roadster lately, just the odd bit of tinkering time, but I've slowly managed to finish rebuilding the engine over the last few weeks.

Got a decent session in the garage on Friday night though and managed to get the engine in the chassis :)


I still need to either remake the engine mounts, or rework and finish off the ones I've got (following my 25mm offset - see earlier post), but they'll do for now!

It feels like a massive step forward having the engine in place :)  and it opens up lots of other jobs I can get on with now (exhuast, intake system, engine wiring, cooling system, etc, etc...  Not sure where to start!).

Friday 1 June 2012

Engine Re-build

Haven't had much time to spend on the Roadster lately, but have been slowly stripping the engine down as I have the odd 5 minute here and there.

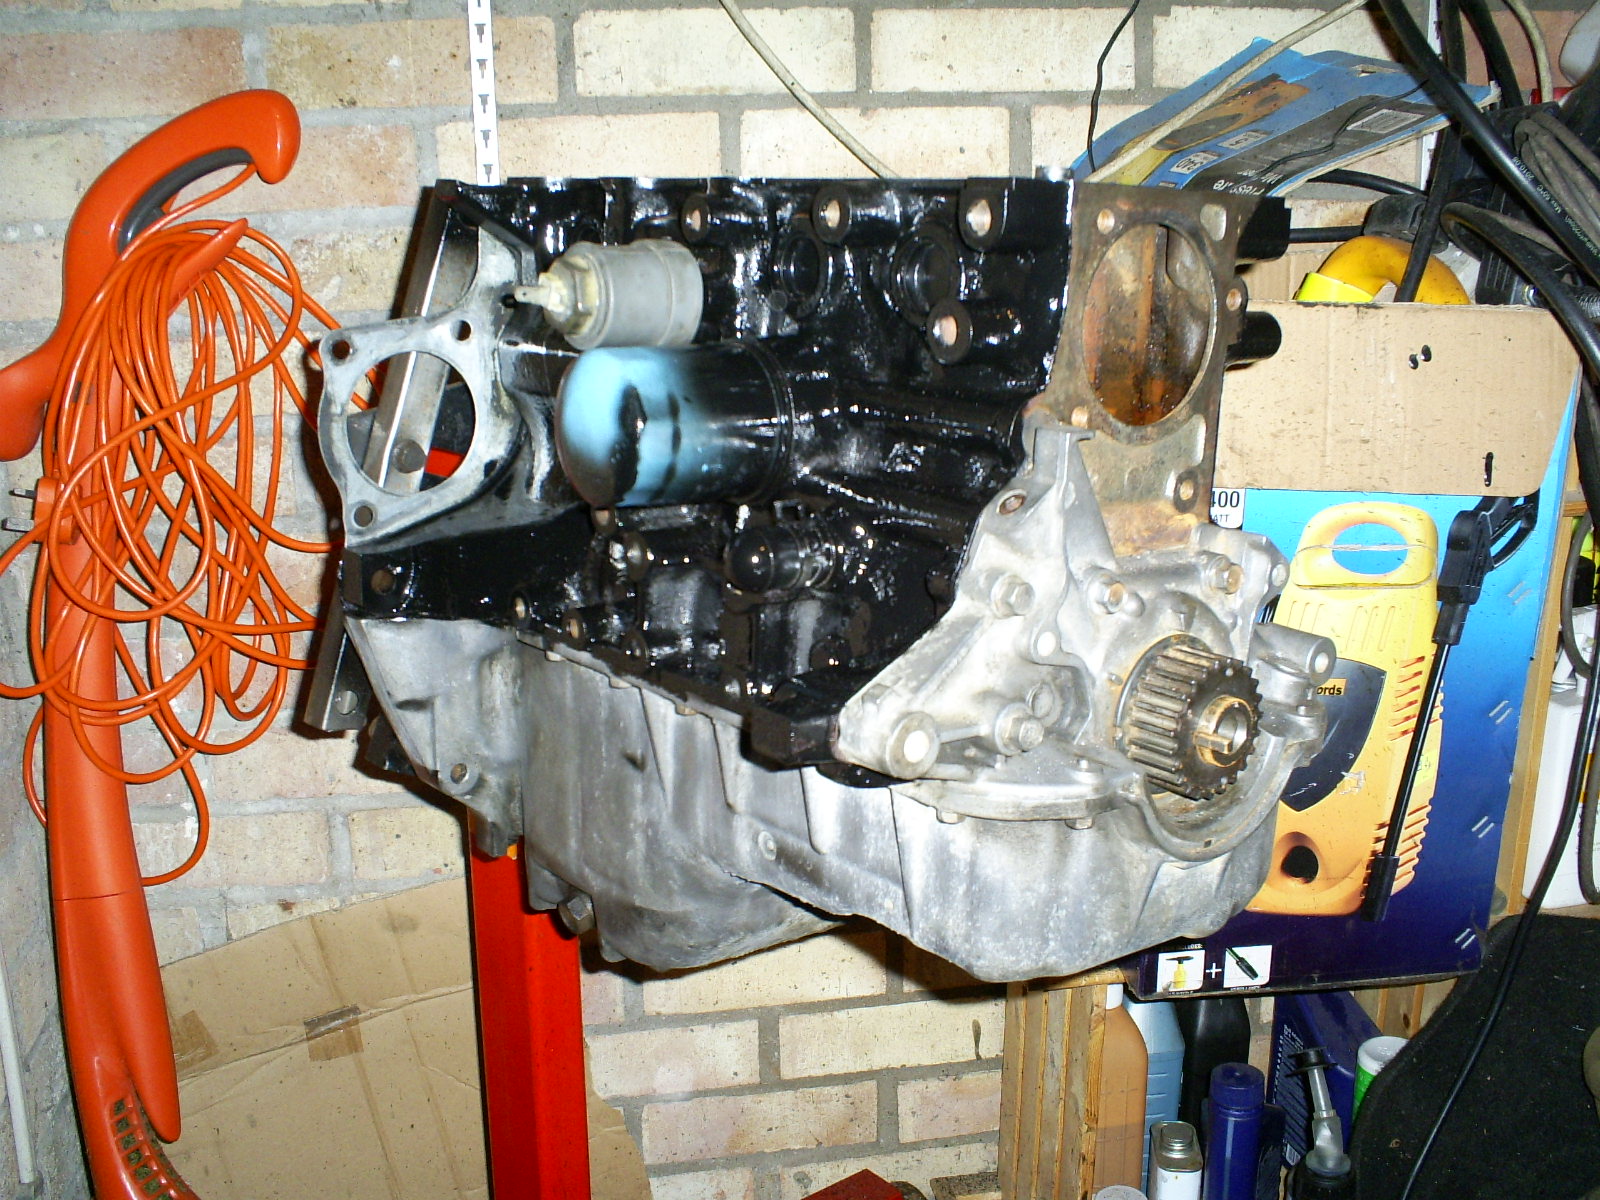
I've now stripped the block as far as I'm going to, and I'm now ready to start putting it back together again!
I decided to leave the bottom end alone, as it felt fine when I drove the donor, and I can't detect the slightest bit of roughness or play when I rotate it by hand.
The bores also look perfect, and the piston rings appear to be sealing well.


While I was at it I decided to paint the sides of the block with a can of high temperature paint.  Not the best job in the world, but it'll do!
Did bother doing the front or back, as no one will see those once I put it back together :)
A mate of mine who's rather better with a can of paint than me has offered to paint the cam cover, so that should look pretty good at least!

Wednesday 16 May 2012

Throttle Cable Outer Stop

To stop the throttle cable outer wandering about at the pedal box end I  got a bicycle brake cable adjuster...


...and stuck it in the pedal box:


Job done!

ECU Location

After moving the battery out of the passenger footwell I decided to fill the freed up space with the ECU.
I used two of the existing ECU brackets (one of which was chopped down a bit) to bolt the ECU to the bulkhead.
It's not exactly heavy, so two M8 bolts and nylocs should be ample!
I also stuck some self adhesive foam to the back of the ECU before I bolted it on.  It'll do bugger all vibration wise, but it made it 'sit' better.

 
The loom to the ECU is the original MX5 one, albeit heavily stripped and modified.
The bulk of the loom goes to the engine bay via a hole in the side of the tranny tunnel panel using one of the MX5 engine loom grommets to protect it.
The rest of the loom goes up into the scuttle where it will eventually connect to the fusebox, clocks, and pedal box.